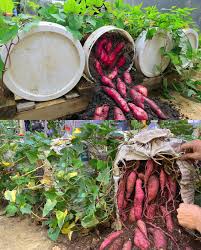
Sweet potatoes are a versatile, nutritious, and delicious vegetable that can easily be grown in containers, making them perfect for those with limited space. While typically grown in the ground, container gardening allows you to cultivate sweet potatoes even on a balcony or patio. In this guide, we’ll show you how to successfully grow sweet potatoes at home using a container, from sprouting slips to harvesting your crop.
Materials You’ll Need:
- Sweet potato(s)
- A glass or container for water
- Toothpicks
- A large planter, bucket, or grow bag for planting
- High-quality potting mix
- Organic fertilizer
- A sunny location
- Watering can
Step 1: Selecting Sweet Potatoes
Start with high-quality, organic sweet potatoes. They have a better chance of sprouting and are more likely to yield a healthy crop. Choose firm potatoes without any soft spots or signs of decay.
Step 2: Growing Sweet Potato Slips
To grow sweet potatoes, you’ll need to first grow slips (the shoots that sprout from the potato). You can do this using one of two methods:

a. Whole Potato Method:
- Prepare the Potato: Place a whole sweet potato in a glass or container filled with water. Insert toothpicks around the middle of the potato, allowing it to rest in the water with the pointed end facing down.
- Location: Place the container in a warm, sunny spot such as a windowsill.
- Watering: Change the water regularly, ensuring the bottom of the sweet potato remains submerged.
- Wait for Slips: In 4-6 weeks, you should see slips (young shoots) growing from the top of the sweet potato. Once the slips are 6-8 inches long, they are ready to be removed.
b. Slice Method:
- Prepare the Potato: Slice the sweet potato into 1-inch thick pieces.
- Water and Support: Insert toothpicks into the slices, positioning them so half of each slice is submerged in water.
- Location: Place the container in a sunny, warm location and change the water regularly.
- Wait for Slips: After 4-6 weeks, slips will form on the potato slices.
Step 3: Transplanting the Slips
When the slips reach 6-8 inches, it’s time to transplant them into your container.
- Prepare the Container: Fill a container with high-quality potting mix, leaving about 3 inches of space at the top.
- Planting: Create a hole deep enough for the slip’s roots and about 2 inches of the stem. Gently remove the slips from the water, taking care to keep the roots intact.
- Plant the Slips: Place the slips in the hole, making sure they are securely planted and surrounded by soil.
- Water Thoroughly: Give your newly planted slips a good watering to settle the soil around them.
Step 4: Caring for Your Container Garden
To ensure healthy growth, follow these care guidelines:
- Sunlight: Place your container in a sunny location where the plants will receive at least 6-8 hours of sunlight daily.
- Watering: Keep the soil consistently moist but not waterlogged. Water when the soil feels dry to the touch.
- Fertilizing: Use an organic fertilizer every 3-4 weeks to encourage vigorous growth.
- Drainage: Ensure your container has proper drainage to prevent waterlogging.
- Pest Control: Keep an eye out for pests or diseases and treat them promptly to avoid damage.
Step 5: Harvesting Your Sweet Potatoes
Sweet potatoes typically mature in about 3-4 months. The best indicator for harvest is when the vines begin to yellow and die back. Gently dig around the base of the plant to harvest the tubers, being careful not to damage them.
Conclusion
Growing sweet potatoes in containers is a rewarding and achievable gardening project, even for beginners or those with limited space. By following these simple steps, you can enjoy homegrown, fresh sweet potatoes in just a few months. With the right care and conditions, your container garden will yield a bountiful harvest of delicious, nutritious sweet potatoes. Happy gardening!
