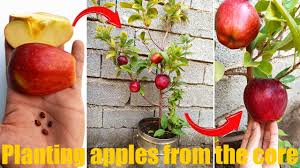
Apple trees are a delightful addition to any garden, offering beauty and a steady supply of fruit throughout the year. While commercial growers often rely on grafted rootstocks for uniformity, growing an apple tree from seed is a fascinating and educational journey. Keep in mind that apple trees grown from seeds may not produce fruit identical to their parent tree. However, with proper care, they can still yield delicious apples. This guide will walk you through the process, from seed preparation to nurturing your apple tree to maturity.
Step 1: Collecting Apple Seeds
- Select the Variety: Choose an apple variety based on taste, size, and suitability to your local climate.
- Extract the Seeds: Cut open ripe, healthy apples and remove the seeds. Rinse them thoroughly to remove any pulp or residue.
- Dry the Seeds: Spread the seeds on a clean surface and allow them to air dry for a few days to prevent mold growth.
Step 2: Preparing Seeds Through Cold Stratification
Apple seeds need a period of cold stratification to mimic the natural winter conditions that break dormancy.
- Process: Wrap the dried seeds in a damp paper towel and place them in a plastic bag.
- Refrigeration: Store the bag in the refrigerator for 6-8 weeks. Check periodically to ensure the towel remains damp.

Step 3: Germinating the Seeds
After cold stratification, the seeds are ready to sprout.
- Planting: Fill small pots or a seedling tray with well-draining potting soil. Plant seeds ½ inch deep, covering lightly with soil.
- Create a Greenhouse Effect: Cover the pots with plastic wrap or a clear lid to retain moisture.
- Light and Warmth: Place the container in a warm, well-lit spot, such as near a window with indirect sunlight.
- Watering: Keep the soil moist but not waterlogged. Once sprouts appear, remove the plastic cover.
Step 4: Caring for Seedlings
- Sunlight: Ensure seedlings receive plenty of light. If growing indoors, use a grow light to supplement natural light.
- Watering: Maintain consistent moisture, avoiding overly dry or soggy soil.
- Transplanting: When seedlings grow a few inches tall with several leaves, move them to larger pots or prepare them for outdoor planting.
Step 5: Transplanting to the Ground
- Choose the Location: Pick a sunny, well-drained spot in your garden.
- Prepare the Hole: Dig a hole twice the size of the root ball.
- Plant the Seedling: Carefully remove the seedling from its pot, keeping the roots intact. Place it in the hole and backfill with soil, pressing gently.
- Watering: Give the transplanted seedling a thorough soak.
Step 6: Long-Term Care and Maintenance
- Mulching: Apply mulch around the base to retain moisture and prevent weeds.
- Watering: Provide at least 1 inch of water weekly, especially during dry periods.
- Pruning: Prune annually to shape the tree, remove diseased branches, and promote healthy growth.
- Fertilization: Use a balanced, slow-release fertilizer in spring for optimal development.
Step 7: Harvesting the Fruits of Your Labor
- Time to Fruit: Apple trees grown from seeds typically take 6-10 years to bear fruit.
- Enjoy the Harvest: The apples may differ in flavor and appearance from the parent tree, but they will still be uniquely yours.
Conclusion
Growing an apple tree from seed is a fulfilling process that requires patience, care, and dedication. Watching your tree transform from a tiny seed into a flourishing tree is a rewarding experience. With consistent attention to its needs, your apple tree will become a source of beauty and bountiful harvests for years to come.
Now that you know how to grow an apple tree, why not celebrate with a delicious treat? Try making an Apple Rose Dessert—a stunning and simple recipe to enjoy your garden’s bounty!
