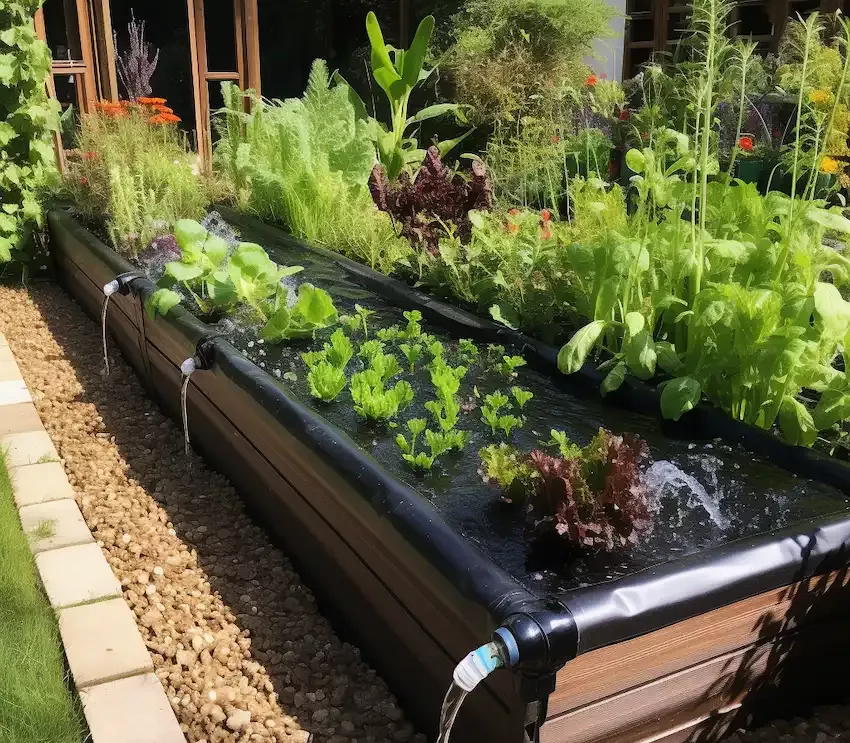
In urban landscapes where concrete jungles dominate, finding ways to cultivate greenery can seem challenging. However, the wicking bed offers a sustainable, space-efficient, and water-conserving solution. This innovative gardening system transforms limited urban spaces into thriving, productive gardens while promoting resource conservation.
What is a Wicking Bed?
A wicking bed is essentially a self-watering raised garden bed that efficiently delivers moisture to plant roots from a built-in water reservoir. Through the process of capillary action — the same mechanism that enables a sponge to draw up water — moisture moves upward, ensuring a consistent water supply. This design significantly reduces the frequency of watering, making it a perfect choice for areas facing water scarcity or for gardeners seeking low-maintenance options.
Key Components of a Wicking Bed
- Container: A sturdy, water-tight container forms the foundation of your wicking bed. Suitable options include repurposed bathtubs, large planters, or custom-built wooden frames lined with a waterproof membrane. The container must be deep enough to accommodate both a water reservoir and a soil layer.
- Waterproof Liner: To create the water reservoir, line the container with a high-quality, durable waterproof membrane. This liner ensures that water remains in the reservoir and prevents leaks.
- Water Distribution System: A crucial component of the wicking bed is the ‘L’-shaped PVC pipe. This pipe lays horizontally along the bottom of the bed and is perforated to allow even distribution of water. The vertical section extends above the surface, serving as a fill point for adding water directly to the reservoir.
- Aggregate Layer: This bottom layer, made of coarse materials like gravel or crushed stone, acts as the water storage zone. The layer must be level to ensure uniform water distribution.
- Geotextile Barrier: To prevent soil from clogging the aggregate layer, a geotextile fabric is placed on top of the aggregate. This material allows water to wick upwards while keeping the soil in place.
- Soil Layer: Above the geotextile barrier, a rich, well-draining soil mix is added. The type of soil you use should match the needs of the plants you intend to grow, such as vegetables, herbs, or flowers.
- Overflow Outlet: An overflow valve or pipe is installed at the height where the soil layer meets the aggregate. This feature ensures excess water can drain out, preventing waterlogging and maintaining healthy soil conditions.
- Plants and Mulch: With the wicking bed fully assembled, it’s time to plant your chosen crops. To further reduce water loss, cover the soil with a layer of organic mulch, which slows evaporation and maintains moisture.

How to Build a Long-Lasting Wicking Bed
- Choose Your Container: Select a container that is strong, weather-resistant, and large enough to accommodate your garden’s needs. Ensure it can hold a significant water reservoir and support a soil layer.
- Line the Container: Use a durable waterproof membrane to line the entire container, making it leak-proof. This step is essential for retaining water in the reservoir.
- Install the Watering System: Position the ‘L’-shaped PVC pipe along the length of the container’s bottom, ensuring the perforated side faces down. The vertical end of the pipe should extend above the top of the bed to allow for easy water filling.
- Add the Aggregate: Pour a layer of coarse gravel or similar material at the bottom of the container. Spread it evenly to create a stable water reservoir.
- Apply the Geotextile Barrier: Place the geotextile fabric over the aggregate layer, ensuring it fully covers the bottom and sides. This barrier separates the soil from the reservoir, preventing contamination.
- Fill with Soil: Add a rich, organic soil mix on top of the geotextile barrier. Ensure the soil is loose and well-draining to allow for healthy root development.
- Install the Overflow Pipe: Drill a hole in the container’s side at the height where the soil and aggregate layers meet. Insert an overflow pipe or valve to drain excess water, keeping the reservoir at an optimal level.
- Plant and Mulch: Plant your seeds or seedlings in the soil layer. Cover the soil’s surface with a layer of organic mulch to reduce evaporation and maintain moisture.
- Water and Maintain: Fill the reservoir through the vertical pipe until water flows out of the overflow outlet. Once filled, the wicking system takes over, allowing plants to draw water as needed. Periodically check water levels and refill as necessary.
Why Build a Wicking Bed?
- Water Efficiency: Wicking beds reduce water usage by delivering moisture directly to plant roots, minimizing evaporation and runoff.
- Low Maintenance: With less frequent watering required, gardeners can spend more time enjoying their garden and less time tending to it.
- Urban Gardening: This system makes it easy to grow fresh produce in small spaces, even on balconies or rooftops.
- Eco-Friendly: By conserving water and utilizing recycled materials like old bathtubs or repurposed planters, you’re contributing to a greener future.
A well-built wicking bed is a step toward self-sufficiency and sustainable living. It empowers urban gardeners to grow fresh, healthy produce while conserving water and reducing maintenance. By embracing this method, you’re planting the seeds for a greener, more resilient urban future.
