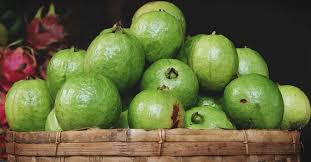
Guava (Psidium guajava) is a sweet, tropical fruit that offers a delicious burst of flavor. Traditionally grown in tropical and subtropical climates, guava can also be cultivated at home in pots, making it accessible to gardeners in diverse regions. This guide will walk you through every step of growing guava in pots, from seed collection to harvesting a fruitful bounty.
1. Harvesting Guava Seeds
The journey begins with collecting viable guava seeds from ripe fruit. Follow these steps to get started:
Materials You’ll Need:
- Ripe guava fruit
- Knife
- Spoon
Steps to Harvest Seeds
- Select a Ripe Guava: Choose a guava that feels soft to the touch but not mushy. This indicates it’s fully ripe and ideal for seed extraction.
- Cut Open the Guava: Use a clean, sharp knife to slice the guava in half, being careful not to damage the seeds.
- Remove the Seeds: Scoop out the seeds with a spoon, ensuring you collect all the seeds from the fruit’s center.
- Clean the Seeds: Rinse the seeds thoroughly under running water to remove any pulp. Dry them using a paper towel to prepare for germination.
2. Germinating Guava Seeds
Proper seed germination increases the chances of growing strong, healthy guava seedlings.
Materials You’ll Need:
- Guava seeds
- Moist paper towel
- Plastic ziplock bag
Steps to Germinate Seeds
- Prepare the Paper Towel: Place guava seeds on a damp paper towel, ensuring they’re spaced apart.
- Fold the Paper Towel: Fold the paper towel over the seeds to create a protective packet.
- Seal in a Ziplock Bag: Insert the paper towel into a ziplock bag and seal it to maintain moisture and warmth.
- Store in a Warm Spot: Place the bag in a warm location (75°F to 85°F / 24°C to 29°C), such as a windowsill or near a heat source.
- Monitor the Seeds: Check the moisture level regularly, ensuring the paper towel stays damp. Germination typically takes 2 to 8 weeks.
3. Planting Guava Seedlings in Pots
Once seeds have germinated and roots are visible, it’s time to transplant them into pots.
Materials You’ll Need:
- Germinated guava seedlings
- Pots (10-12 inches in diameter) with drainage holes
- Well-draining potting mix
- Watering can
- Balanced, slow-release fertilizer
Steps to Plant Seedlings
- Prepare the Pots: Select pots with adequate drainage. Fill them with a well-draining potting mix suitable for fruit trees.
- Transplant the Seedlings: Dig a small hole in the center of the pot and place the seedling’s root gently into the hole. Cover it lightly with soil.
- Water Thoroughly: Water the seedling until the soil is evenly moist. Keep the moisture level consistent.
- Fertilize Regularly: Once the seedling establishes roots, begin feeding it with a balanced, slow-release fertilizer to support healthy growth.

4. Caring for Your Potted Guava Tree
For a thriving guava tree, you’ll need to provide proper care and maintenance. Here’s what to do:
1. Sunlight
Place the guava pot in a sunny spot where it receives 6-8 hours of direct sunlight daily. Guava thrives in bright, sunny conditions.
2. Watering
Maintain consistent moisture, ensuring the soil is moist but not waterlogged. Avoid letting the soil dry out completely.
3. Pruning
Prune your guava tree regularly to promote airflow, remove dead or diseased branches, and encourage fresh growth. Pruning also helps maintain a manageable size for your potted plant.
4. Pest and Disease Management
Watch for common guava pests like fruit flies and aphids. Apply natural remedies or insecticidal soaps as needed to keep pests under control.
5. Frost Protection
In colder climates, protect your guava tree from frost. Move potted guava trees indoors during the winter or use frost cloths to shield them from freezing temperatures.
6. Fruit Thinning
To promote larger, healthier fruit, remove smaller, underdeveloped fruits. This process allows the tree’s energy to be directed toward growing bigger, better-quality fruit.
5. Harvesting Your Guava
Your patience will be rewarded when it’s time to harvest your guava fruits.
- Check for Ripeness: Ripe guavas will change color and become fragrant. They will feel soft when pressed gently.
- Harvest Carefully: To harvest, twist the fruit gently to detach it from the branch.
By following these steps, you’ll be on your way to growing a healthy, productive guava tree in the comfort of your home. With consistent care and attention, you’ll enjoy a bountiful harvest of sweet, homegrown guavas.
