Making flavored vinegars is a delightful way to preserve the fresh, vibrant flavors of herbs, fruits, and vegetables. Not only do they enhance your meals, but they also make thoughtful, homemade gifts, especially for the holiday season. By packaging them in decorative bottles, tied with raffia or ribbon, and adding a personalized label, you can create an elegant and functional gift. Here’s a step-by-step guide to making your own flavored vinegars and ensuring they are safe and delicious.
Sterilizing Bottles: A Critical First Step
When preserving foods in vinegar, it’s essential to maintain the right level of acidity to inhibit the growth of harmful bacteria. Vinegar naturally preserves ingredients, but you must still sterilize your bottles to ensure the safety and longevity of your flavored vinegar.
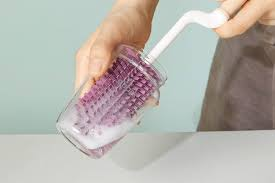
Start by washing your bottles in hot, soapy water, then rinse them thoroughly. Avoid using a dish towel to dry them. Instead, place the bottles in an oven preheated to 140°C (280°F) for 10 minutes to sterilize them. Alternatively, you can use a water-bath canner, gradually heating the bottles to a boil once they are filled. Always work with warm bottles to reduce the risk of contamination.
Choosing the Right Vinegar
Flavored vinegars can be made with herbs, fruits, or vegetables. It’s crucial to select a clear vinegar that won’t overpower the delicate flavors you want to infuse. Common choices include white vinegar, distilled vinegar, and white wine vinegar.
When preparing the vinegar mixture, never use metal utensils or bowls, as the acid can react with the metal. Instead, opt for glass, plastic, or wooden tools.
How to Make Fruit Vinegars
To make fruit vinegar, start by bruising your soft fruits or berries to release their juices. For every pound (500g) of fruit, add one pint (0.5L) of vinegar. Cover the mixture with a clean cloth and let it infuse for four days, stirring twice daily.
After the infusion period, strain the liquid through muslin or cheesecloth. In a saucepan, combine the strained liquid with ½ pound (250g) of sugar per pint (0.5L) of vinegar. Boil the sweetened mixture for 10 minutes, then pour it into sterilized bottles or jars. This fruit vinegar can be used in desserts or diluted with water for a refreshing beverage.
How to Make Vegetable Vinegars
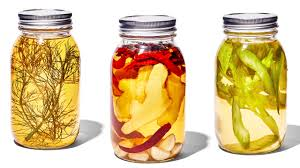
Vegetable vinegars are equally simple to prepare. Chop your vegetables, place them in a jar, and pour vinegar over them. Seal the jar and let it infuse for two to six weeks. After the infusion period, strain the mixture through cheesecloth and store it in bottles.
Popular vegetables for infusing include celery, chili peppers, cucumber, and garlic. Celery vinegar, for example, made with white wine vinegar, is delicious when poured over cold cuts or roasted meats.
How to Make Herb Vinegars
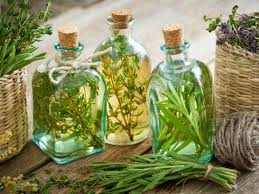
Herb vinegars make beautiful and aromatic gifts. Start by washing fresh herb sprigs, then allow them to dry. Gently bruise the leaves by scraping them with the back of a spoon to release their essential oils. Pack the sprigs into sterilized bottles.
Heat your vinegar just below boiling point, then carefully pour it over the herbs in the bottle, ensuring the herbs are fully submerged. Seal the bottle and let the vinegar cool completely before capping it.
Storing and Using Flavored Vinegars
Store your flavored vinegars in a cool, dark place. They will keep for at least four months and can last up to six months in the refrigerator. To prevent mold growth, remove any used herb sprigs from the bottle as they are consumed.
If you notice that the seal is broken or the vinegar appears cloudy or spoiled, it’s best to discard it to avoid any health risks. By following proper sterilization and storage guidelines, your flavored vinegars should remain in excellent condition.
Flavored vinegars are a wonderful way to preserve the flavors of the season and share them with loved ones. Whether you’re making fruity, herbal, or vegetable infusions, these homemade gifts will brighten anyone’s holiday table. Let us know your favorite flavored vinegar recipes in the comments below!