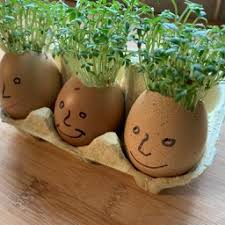
Cress, often associated with simple window-sill projects for children, deserves a place in the garden of adults who appreciate its bold flavor and versatility. Easy to grow and quick to harvest, it offers a spicy, mustard-like punch that elevates any dish. But there’s much more to cress than the delicate, tiny leaves we often see in kids’ crafts. Let’s explore how to grow cress in a way that makes it a staple for adult gardens and kitchens.
Getting Started with Cress: For Beginners and Children
Growing cress is an excellent way for beginners, including children, to learn about germination. The process is simple: start with a shallow tray or container, such as a recycled plastic food container, and line it with a damp paper towel, cotton wool, or kitchen roll. Sprinkle the cress seeds evenly on top, then cover the container with cling film to retain moisture. Be careful not to overwater—the paper should be damp, not soggy.
In just a day or two, you’ll see seeds begin to sprout, and in about five to seven days, the cress will be ready to harvest. At this point, you can snip the stalks off and use them in salads, sandwiches, or as a garnish.
While it’s easy and fun for kids to grow cress, remember that the small, early leaves are just the beginning. To grow a more substantial and flavorful version, you’ll need to let it mature beyond the initial harvest.
Growing Cress for Adults: A More Robust Crop
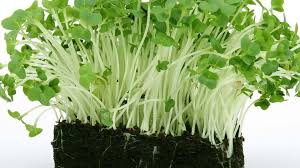
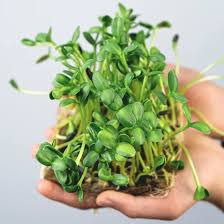
Cress is far more than just a garnish—it can be a vibrant addition to your kitchen. Unlike the fast-growing, delicate variety typically grown for children, you can grow mature cress that develops full, feathery leaves with a peppery kick. This version thrives both indoors and outdoors, making it a year-round crop if planted on a sunny windowsill or in outdoor garden beds after the frost has passed.
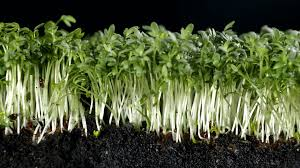
For indoor growing, use a pot with at least a three-inch depth and fill it with moist, well-draining compost. Sprinkle the cress seeds over the surface, pressing them lightly into the soil. Cress needs moisture to grow, so keep the soil damp without allowing it to become waterlogged. If you’re growing cress outside, sow the seeds in rows or blocks, spaced about half an inch apart, in an area that’s partially shaded to prevent the plants from bolting in the heat.
Choosing the Right Variety of Cress
Cress comes in several varieties, each with its unique flavor and appearance. Common, Curled, and Greek Cress are all very similar, though larger-leafed varieties tend to have milder flavors. If you’re looking for speed, consider “Sprint” cress, which germinates faster than other types.
Cress grows quickly—within four weeks, you’ll have leafy greens that reach about six inches high. If left longer, the plant will start to flower and go to seed. But don’t throw it out just yet! While the leaves may lose their punch, the small white flowers are still edible and pack a mustardy bite, providing a burst of flavor.
Cress in the Garden and Kitchen
While cress is typically harvested young, allowing it to grow longer offers another advantage: its flowers and seeds. When harvesting, snip the stems just above a growing point. Cress may produce a second flush of leaves, but it’s not the most reliable regrowth, so regular sowing ensures you always have fresh cress.
Cress doesn’t hold up well when cooked, losing much of its flavor, but it can add texture and a peppery warmth to fresh dishes like salads. It’s ideal for intercropping in the garden, filling gaps while slower-growing crops get started.
Conclusion
Cress is more than just a child’s project—it’s a fast-growing, flavorful addition to your culinary repertoire. Whether grown on a windowsill or in the garden, it’s an easy-to-care-for plant that yields high returns in flavor and versatility. By taking the time to let it mature, you can enjoy its vibrant taste all season long, adding a mustardy punch to salads, sandwiches, and more. So go ahead, grow some grown-up cress, and discover how this humble plant can elevate your meals.