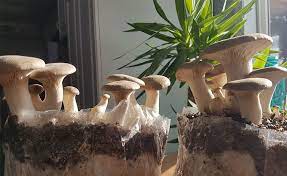
Mushrooms are a versatile culinary delight, perfect for elevating a variety of dishes. However, store-bought mushrooms can be pricey, and their freshness often leaves much to be desired. What if you could grow your own mushrooms at home, sustainably and affordably? This guide will walk you through an innovative method to cultivate mushrooms in recycled 5-liter plastic bottles, transforming waste into a thriving mushroom farm. In just 45 days, you can enjoy a fresh, homegrown harvest while reducing your environmental footprint.
Materials and Equipment Needed:
- Recycled 5-liter plastic bottles
- Straw (boiled to remove contaminants)
- Mushroom spores or mycelium
- Plastic wrap
- High-pressure watering can
- Soil and nutrient-rich substrate
Step-by-Step Guide:
Step 1: Prepare the Plastic Bottles
Start by thoroughly cleaning and sanitizing your recycled bottles to create a sterile environment for mushroom growth. Cut off the top section of each bottle, leaving the base intact as the growing container.
Step 2: Treat the Straw
Straw serves as an ideal growing medium. Boil it for 30 minutes to kill any bacteria or fungi, then let it cool and drain. The softened, sterilized straw is now ready to nurture your mushrooms.
Step 3: Add Air Holes
Use a heated metal rod or drill to make small holes throughout the bottle. These air exchange points are crucial for mushroom growth, as they provide the oxygen needed for the mycelium to thrive.
Step 4: Layer the Growing Medium
Start by adding a layer of the boiled straw to the bottle’s bottom, ensuring even distribution without compressing it too tightly. Sprinkle the mushroom spores or spread the mycelium onto this base layer. Continue layering straw and spores until the bottle is filled.

Step 5: Create a Humid Environment
Cover the open top of the bottle with plastic wrap to retain moisture and maintain a humid environment, which is essential for mycelium growth.
Step 6: Begin Watering
Use a high-pressure watering can to lightly moisten the straw and spores inside the bottle. Avoid overwatering, as excessive moisture can lead to mold growth.
Step 7: Observe and Remove Plastic Wrap
Over the next 12 days, monitor your bottles for signs of growth. Mycelium, a white, web-like network, will begin to spread through the straw. Once this is visible, carefully remove the plastic wrap to allow more airflow.
Step 8: Regular Watering
After removing the plastic wrap, continue watering directly through the top opening. Keep the growing medium consistently moist but not soggy.
Step 9: Add Soil and Substrate
Around days 12–15, add a thin layer of nutrient-rich soil and substrate on top of the straw. This layer provides the essential nutrients for the mushrooms to enter their fruiting stage.
Step 10: Maintain and Harvest
Continue watering and maintaining humidity. Within 45 days, your mushrooms will be fully grown and ready to harvest. Regular care and attention to moisture levels will ensure a bountiful yield.
Why This Method Works
Growing mushrooms in recycled plastic bottles is not only economical but also an environmentally friendly way to reduce plastic waste while enjoying fresh, homegrown fungi. This process mimics nature in a controlled setting, ensuring healthy, organic mushrooms with minimal effort.
By following these steps, you’ll transform everyday waste into a sustainable food source. Imagine the satisfaction of cooking with mushrooms harvested just moments before they hit your pan. Start your mushroom-growing journey today—your taste buds and the planet will thank you!
This version provides a clear, structured guide while emphasizing the benefits of sustainability and homegrown produce.
