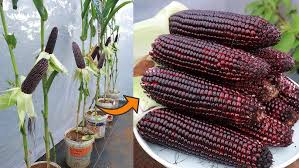
If you’re looking for a sustainable and space-efficient way to grow your own purple corn, using recycled buckets is a perfect solution. This method allows you to cultivate this vibrant, nutrient-rich crop on a balcony, patio, or small garden, all while reducing your environmental footprint. Follow this comprehensive guide to grow purple corn from seed to harvest.
Step 1: Germinating the Seeds
Choose Quality Seeds: Start with premium purple corn seeds. High-quality seeds ensure better germination rates and healthier plants.
Prepare the Right Soil: For the best results, use a well-draining, organic compost mix in a seedling tray or small containers. This type of soil helps the seeds establish strong roots.
Planting the Seeds: Space the seeds about 2 inches apart. Make sure to lightly press them into the soil without burying them too deep. Keep the soil consistently moist, but avoid overwatering, which can cause the seeds to rot.
Optimal Growing Conditions: Place your seed tray in a warm, sunny spot, ideally around 70°F (21°C), or use a heat mat to provide consistent warmth. Germination may take up to two weeks, so be patient.
Step 2: Preparing the Recycled Buckets
Create Drainage Holes: Drill several small holes at the bottom of each recycled bucket to ensure proper drainage. This will prevent water from accumulating and potentially rotting the roots.
Fill with Soil: Fill the bucket with nutrient-rich, loamy soil, leaving about 2-3 inches from the top to allow room for watering. The soil should be fertile and well-draining, with a slightly acidic to neutral pH.
Step 3: Planting the Seedlings
Transplant the Seedlings: Once the seeds have germinated and the seedlings are sturdy enough to handle, gently remove them from the tray. Be cautious not to damage the fragile roots.
Plant at the Right Depth: Carefully place each seedling in the bucket, ensuring the roots are well-covered with soil. The seedling’s base should be level with the soil surface to encourage healthy growth.
Maintain Proper Spacing: Space your seedlings 9-12 inches apart in each bucket. This provides enough room for the plants to grow without overcrowding, which can limit airflow and sunlight.
Step 4: Watering and Feeding
Consistent Watering: Keep the soil consistently moist, especially during dry spells. However, avoid overwatering, as this can suffocate the roots. The soil should feel damp, but not soggy.
Fertilization: Feed your plants with a balanced, slow-release fertilizer. Follow the manufacturer’s instructions to ensure you’re providing the right amount of nutrients at each stage of growth.

Step 5: Ongoing Maintenance
Prune Dead Leaves: Regularly remove any yellowing or dead leaves to improve air circulation and prevent disease. Pruning also directs the plant’s energy to healthier parts.
Provide Support: As your corn grows taller, provide stakes or a trellis for support. Purple corn plants can become quite tall, and sturdy support helps prevent them from toppling over.
Manage Pests: Regularly inspect your plants for pests like aphids or caterpillars. If you spot any, treat your plants with organic pest control methods such as neem oil or insecticidal soap.
Step 6: Harvesting the Purple Corn
Timing the Harvest: Purple corn is typically ready to harvest 2-3 months after planting, depending on growing conditions. The kernels should be deep purple, and the husks should be dry and papery. Gently pull back the husks to check for ripeness before harvesting.
Conclusion
Growing purple corn in recycled buckets is a sustainable and rewarding gardening project. Not only will you enjoy the beauty of vibrant, homegrown corn, but you’ll also help reduce waste by repurposing containers. With the right care and attention, you can harvest a bountiful crop of purple corn, adding a unique and nutritious addition to your garden or balcony.
