Walnut trees are valued for their delicious nuts and beautiful, durable wood. Growing one from a seed can be a rewarding, environmentally conscious project. This guide will walk you through the process, offering practical tips and techniques to successfully propagate walnut trees from seeds, ensuring a healthy, thriving tree.
Step 1: Gather Your Supplies
Before you begin, gather the following materials:
- Mature walnut seeds (either collected from a tree or purchased)
- A pot or container for planting
- High-quality potting soil
- Plastic wrap or a plastic bag
- A sunny spot or grow light
- A watering can or spray bottle
- Pruning shears (for later stages)
Step 2: Select the Right Seeds
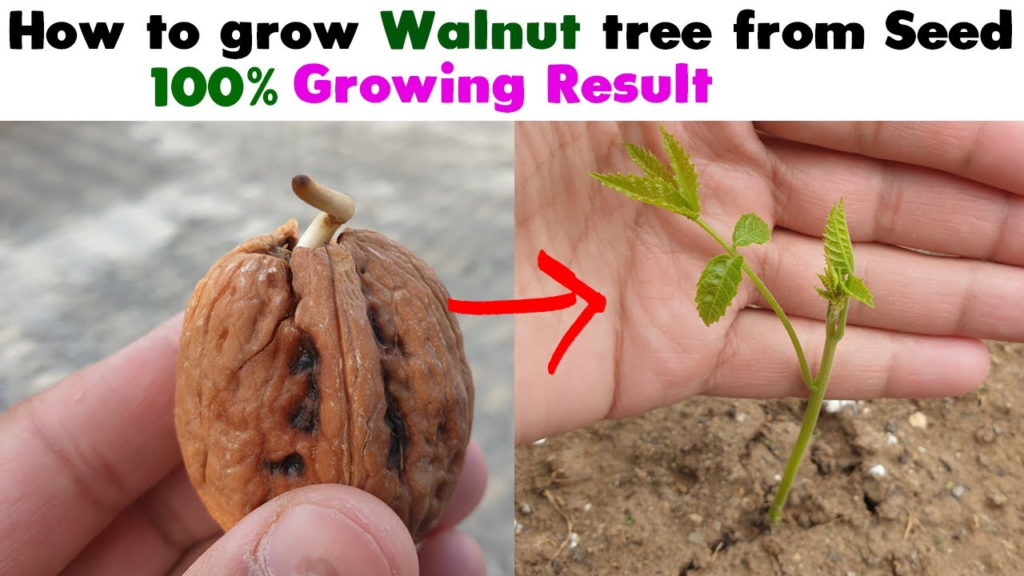
Choose mature, healthy walnut seeds. They should be plump, undamaged, and free from mold. You can obtain seeds from wild trees, purchase them, or collect them from a mature walnut tree.
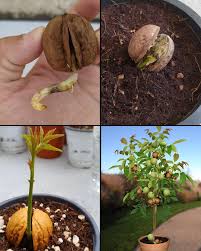
Step 3: Germination Methods
There are several ways to germinate walnut seeds, each suited to different environments and preferences. Below are three effective methods:
Method 1: Cold Stratification
- Fill a container with potting soil, leaving an inch of space at the top.
- Plant the walnut seed about an inch deep.
- Dampen the soil—keep it moist but not soggy.
- Cover the container with plastic wrap or place it in a plastic bag to create humidity.
- Refrigerate the container for 8-12 weeks to simulate winter conditions.
- After stratification, move the container to a sunny location or under grow lights.
Method 2: Soak and Plant
- Soak the walnut seeds in water for 24-48 hours to soften the outer shell.
- Plant the seeds about an inch deep in a pot filled with potting soil.
- Keep the soil lightly damp, but not overly wet.
- Place the container in a sunny spot or use grow lights.
Method 3: Fall Planting
- In the fall, plant walnut seeds directly into the soil where you want your tree.
- Dig a hole about 2 inches deep and place the seed inside.
- Cover it with soil and mark the spot.
- In spring, the seed will begin to germinate.
Step 4: Care and Maintenance
After germination, ensure proper care for your walnut seedlings:
- Keep the soil consistently moist, but avoid waterlogging.
- Provide 6-8 hours of sunlight daily or sufficient grow light exposure.
- Transplant seedlings to a larger container or outdoor location once they reach 4-6 inches tall.
- Protect young trees from pests and animals using fencing or netting.
- Prune dead or diseased branches as the tree grows.
- Fertilize regularly with a balanced, slow-release fertilizer to support growth.
Step 5: Transplanting Outdoors
Once your walnut tree reaches about 2-3 years of age and stands 3-4 feet tall, it’s time to transplant it outdoors:
- Choose a sunny location with well-draining soil.
- Dig a hole twice the size of the root ball and at a similar depth.
- Gently remove the tree from its container, taking care not to disturb the roots.
- Place the tree in the hole, ensuring the top of the root ball is level with the ground.
- Fill the hole with soil, tamping it down gently.
- Water the tree thoroughly to settle the soil.
Conclusion
Growing a walnut tree from a seed is both fulfilling and eco-friendly. By following these steps, selecting the right germination method, and providing proper care, you’ll cultivate a tree that will offer shade, valuable wood, and delicious nuts for years to come. With patience and attention, your walnut tree will grow into a beautiful, productive addition to your garden or landscape.