Introduction
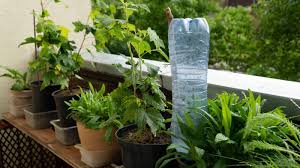
Are you planning a getaway but worried about keeping your beloved plants hydrated in your absence? Fret no more! With this straightforward DIY automatic plant watering system, you can ensure your plants stay lush and healthy while you’re away. This cost-effective, easy-to-assemble solution uses everyday materials and is perfect for both indoor and outdoor plants. Let’s explore how to build this reliable system that will make vacationing stress-free for any plant parent.
What You’ll Need
Here’s a list of materials to gather before you start:
- Plastic Bottle (2L or larger): Choose the size based on the duration of your trip and the water needs of your plants.
- Syringe Needle: To regulate water flow from the bottle.
- Plastic Q-tip (Hollow Inside): Serves as an air inlet to control the flow rate.
- Glue: For sealing and ensuring airtight connections.
- Scissors or Knife: To cut the Q-tip and make other adjustments.

Step-by-Step Guide
- Preparing the Bottle Cap:
- Modify the Q-tip: Cut one end of the hollow plastic Q-tip to create an opening for air to flow through.
- Drill a Hole in the Cap: Use a sharp tool to make a small hole in the plastic bottle cap. The hole should be just large enough for the cut Q-tip to fit snugly.
- Insert and Seal the Q-tip: Push the Q-tip into the hole, ensuring about half an inch extends into the bottle cap. Secure it with glue around the edges to create an airtight seal. This setup will regulate air entering the bottle, balancing the water flow.
- Setting Up the Water Flow:
- Insert the Syringe Needle: Puncture the lower part of the bottle with the syringe needle, ensuring the sharp end points inside the bottle. This creates a controlled water outlet.
- Fill the Bottle: Pour water into the bottle until it’s full. Select a bottle size that matches the watering duration you need.
- Activating the System:
- Position the Bottle: Place the bottle near the plant, ensuring the syringe needle drips water directly into the soil. Gravity will pull water out as air enters through the Q-tip, maintaining a consistent flow.
- Test the System: Run the system for 24 hours before your trip to confirm the flow rate and make adjustments as needed.
Why This System Works
This DIY solution combines simplicity with efficiency. The Q-tip regulates air intake, creating a vacuum that controls the water flow rate, while the syringe needle ensures precise dripping. The result? Your plants receive steady hydration without overwatering.
Conclusion
With this DIY automatic plant watering system, you can travel worry-free knowing your green companions are well cared for. Easy to build, budget-friendly, and highly effective, this project is perfect for plant lovers who want to ensure their leafy friends thrive in their absence. Enjoy your vacation, and return to happy, healthy plants!
