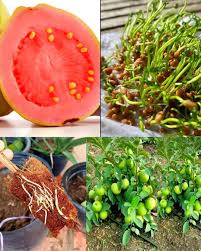
Guava (Psidium guajava) is a tropical treasure known for its sweet, aromatic flavor and impressive health benefits. While these fruits typically flourish in tropical and subtropical climates, you can successfully grow guava at home in pots, making it accessible to gardeners in diverse regions. This guide will take you step-by-step through the process, from harvesting seeds to cultivating a thriving potted guava tree that produces an abundant harvest.
Step 1: Harvesting Guava Seeds
The journey begins with obtaining guava seeds. Follow these simple steps to prepare your seeds for planting:
Materials Needed:
- Ripe guava fruit
- Knife
- Spoon
- Choose a Ripe Guava:
Select a guava that is soft to the touch but not overripe. This ensures mature, viable seeds. - Cut Open the Guava:
Using a sharp knife, carefully slice the guava in half to expose the seeds. Be cautious not to damage the seeds. - Remove the Seeds:
Scoop out the seeds with a spoon, ensuring all seeds embedded in the flesh are collected. - Clean the Seeds:
Rinse the seeds under running water to remove fruit residue, then pat them dry with a paper towel.
Step 2: Germinating Guava Seeds
Proper germination is the foundation of healthy guava plants.
Materials Needed:
- Guava seeds
- Moist paper towel
- Plastic ziplock bag
- Prepare the Seeds:
Spread the seeds on a damp paper towel. Keep them spaced apart to prevent tangling. - Create a Seed Packet:
Fold the paper towel over the seeds and place it inside a sealed ziplock bag. - Store in a Warm Spot:
Keep the bag in a warm, light-filled location with temperatures between 75°F and 85°F (24°C to 29°C). - Monitor and Wait:
Check regularly to maintain moisture. Germination may take 2–8 weeks.

Step 3: Planting Seedlings in Pots
Once sprouted, your guava seedlings are ready to transition to pots.
Materials Needed:
- Germinated seedlings
- Pots (10–12 inches in diameter with drainage holes)
- Well-draining potting mix
- Balanced slow-release fertilizer
- Prepare the Pots:
Use well-draining soil to prevent root rot and ensure proper aeration. - Transplant the Seedlings:
Gently plant the seedlings with roots facing downward. Cover them with soil, leaving the top of the seedling exposed. - Water Consistently:
Water thoroughly but avoid overwatering. Maintain a slightly humid environment for the best growth. - Fertilize Regularly:
Once established, feed your tree with a balanced, slow-release fertilizer to encourage healthy growth and fruit production.
Step 4: Caring for Your Potted Guava Tree
To achieve a fruitful harvest, proper care is essential.
- Sunlight:
Place the pots in a sunny location where they receive 6–8 hours of direct sunlight daily. - Watering:
Keep the soil consistently moist but never soggy. - Pruning:
Regularly trim the tree to maintain its shape, remove dead branches, and encourage new growth. - Pest Management:
Watch for pests like fruit flies or aphids. Use natural or chemical treatments if needed. - Frost Protection:
In colder climates, protect your tree from frost by moving the pots indoors or using frost cloths. - Fruit Thinning:
Thin small, excess fruits to allow the remaining ones to grow larger and healthier. - Harvesting:
When the guavas are slightly soft to the touch, gently twist and remove them from the tree.
A Tropical Delight at Home
Growing guava in pots is a rewarding experience that brings the tropics to your doorstep. With the proper care, your potted guava tree will not only beautify your space but also reward you with sweet, aromatic fruits for years to come. Indulge in the satisfaction of enjoying homegrown guavas, and savor the tropical flavors straight from your own garden!
