By Jessica Jacobs, Contributing Writer
Rain gardens are a practical and visually appealing solution for managing stormwater runoff in suburban settings. As more impervious surfaces like rooftops, driveways, and sidewalks dominate residential landscapes, they contribute to increased water runoff, carrying pollutants into nearby water bodies. A rain garden not only reduces this impact but also enhances the beauty and functionality of your yard.
In this guide, you’ll learn how to create a rain garden that benefits the environment while adding charm to your outdoor space.
What is a Rain Garden?
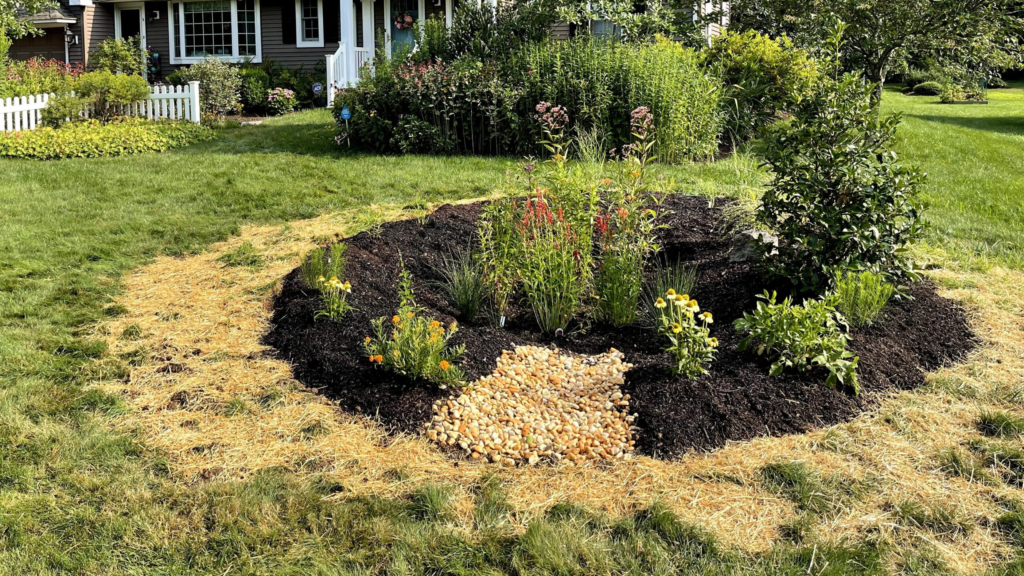
A rain garden is a shallow, landscaped depression designed to collect and filter rainwater from impervious surfaces like roofs and driveways. Acting as a natural sponge, it slows the flow of water, filters out pollutants, and allows clean water to seep into the ground. This eco-friendly feature reduces runoff volume, protects local waterways, and supports biodiversity by attracting pollinators and native wildlife.
Materials Needed:
- Decorative rocks and boulders
- Native plants and grasses
- Landscape fabric
- River rock
- PVC pipe
Tools Needed:
- Wheelbarrow
- Spade
- Level
Step-by-Step Instructions
1. Plan and Design Your Rain Garden
- Choose the Location: Pick an area where water naturally flows or downspouts discharge, ensuring it’s at least 10 feet from your home’s foundation and clear of utility lines.
- Calculate the Size: Factor in your yard’s drainage area, typical rainfall, and soil infiltration rate. A garden that can handle 10% of your total runoff is ideal. Check local guidelines for any specific requirements.
2. Prepare the Site
- Clear the Area: Remove vegetation, rocks, and debris.
- Excavate the Basin: Dig a shallow depression, 4 to 8 inches deep, ensuring the bottom is level to distribute water evenly. Conduct a soil percolation test to confirm adequate drainage.
3. Install PVC Pipe (Optional)
If directing water from downspouts:
- Lay PVC pipes to guide water into the rain garden.
- Position the outlet end at the lowest point of the garden for efficient drainage.
4. Lay Landscape Fabric
Line the basin with landscape fabric to prevent weeds and reduce soil erosion. Trim the fabric to fit the edges neatly.
5. Add River Rock and Decorative Elements
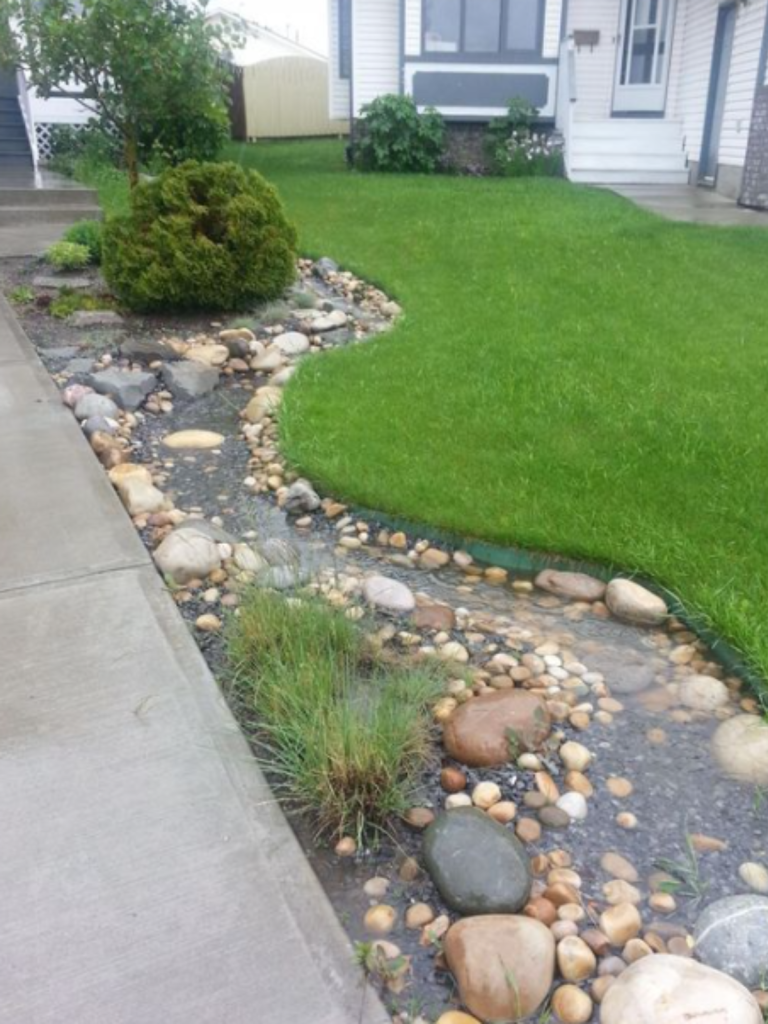
- River Rock: Spread a layer of river rock at the base for improved drainage and a polished appearance.
- Decorative Rocks: Arrange larger rocks and boulders to create focal points and add aesthetic appeal.
6. Select and Plant Native Vegetation
- Choose Native Plants: Select species that thrive in your climate, require minimal maintenance, and attract pollinators. Examples include coneflowers, sedges, asters, and daylilies.
- Plant Layout: Group plants based on water tolerance. Place moisture-tolerant plants in the center and drought-resistant varieties along the edges.
7. Mulch and Water
- Apply Mulch: Spread organic mulch around the plants to retain moisture, suppress weeds, and protect roots.
- Water Thoroughly: Water the garden immediately after planting and as needed until the plants are well-established.
8. Maintain Your Rain Garden
- Weed Regularly: Keep weeds at bay to maintain the garden’s health.
- Monitor Performance: Observe how it handles rainwater and make adjustments if necessary. Prune and divide plants to encourage growth and maintain aesthetics.

A well-designed rain garden not only manages stormwater effectively but also enhances your yard’s beauty and biodiversity. By following these steps, you can create a functional and sustainable feature that contributes to a healthier environment.
