By Benedict Vanheems
Winter can feel like a barren time for gardeners. Harsh winds, snow, and relentless rain can make outdoor growing nearly impossible. However, this doesn’t mean you can’t enjoy fresh, nutritious food during the cold months. Indoor sprouting is a great way to grow healthy greens like mung bean sprouts in just five days, providing you with a fresh and easy-to-grow food source throughout the winter.
Why Mung Bean Sprouts?
Mung beans are small, but they pack a big nutritional punch. Rich in protein, fiber, vitamins, and minerals, mung bean sprouts are a great addition to salads, sandwiches, spring rolls, and wraps. They’re also incredibly easy to grow, making them the perfect winter crop for anyone looking to add fresh food to their diet in a short amount of time.
How to Grow Mung Bean Sprouts: A Step-by-Step Guide
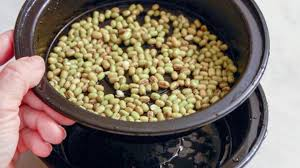
Day 1: Soak the Beans
Start by rinsing half a cup (about 80g) of mung beans thoroughly. Place them in a bowl and cover them with water. Let them soak overnight or for at least 12 hours to allow them to swell and start the germination process.
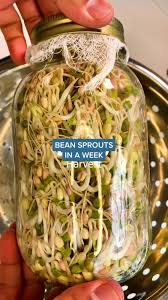
Day 2: Prepare the Sprouting Container
Once soaked, the beans will have expanded. Now it’s time to prepare your sprouting container. Clean an empty juice carton (avoid those that contained dairy or non-acidic liquids), making sure it’s free from any residue. The carton will help keep the sprouts in darkness, encouraging crisp, white growth.
Using a knife, cut small holes in the top corners of the carton. These holes should be large enough to allow water to drain out but small enough to keep the beans in place. This will also allow air circulation to encourage healthy sprouting.
Day 2 (continued): Drain and Rinse
Drain the soaked beans and place them in the prepared carton. Fill the carton with lukewarm water, then close the lid and turn it upside down so the water drains out through the holes. You will need to rinse and drain the beans twice a day—once in the morning and once in the evening.
Day 3: Continue Rinsing
By the third day, the mung beans will begin to sprout, though you may not see much yet. Continue the rinse-and-drain process twice daily.
Day 4: Watch Them Grow
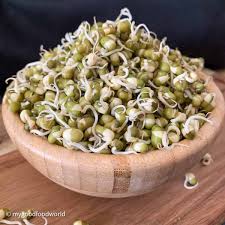
On day four, your mung bean sprouts will be well on their way. They’ll be white and crunchy, and you can eat them now, but if you wait just one more day, they’ll be perfect!
Day 5: Ready to Eat!
On day five, your mung bean sprouts will be fully developed and ready to harvest. Cut open the carton and gently remove the sprouts.
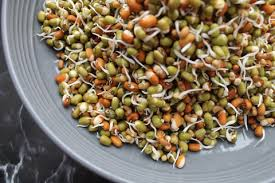
Rinsing and Storing Your Mung Bean Sprouts
Before eating your sprouts, you’ll need to rinse them well to remove the husks. Place the sprouts in a large bowl of water. The husks will float to the surface, so carefully skim them off. Some husks may sink to the bottom, so rinse again, discarding the husks and keeping the clean sprouts.
Fresh mung bean sprouts will last for up to three days in the fridge, but they should be eaten within that time for the best taste and texture.
How to Enjoy Mung Bean Sprouts
Homegrown mung bean sprouts are deliciously crunchy. They’re fantastic in stir-fries with garlic, ginger, soy sauce, and sesame oil. You can also add them to salads or use them as a topping for sandwiches or wraps.
Growing your own mung bean sprouts is easy, quick, and rewarding. Not only does it provide fresh food during winter, but it also adds nutritional value to your meals. Enjoy the process and feel free to share your own sprouting tips and recipes! Bon appétit!