Long beans, also known as yard-long beans or asparagus beans, are a versatile and tasty vegetable to grow, especially in container gardens. Their high yield, delicious flavor, and ease of cultivation make them ideal for home gardeners with limited space. Here’s a step-by-step guide to growing long beans successfully in containers:
Step 1: Seed Preparation
To encourage successful germination, start by soaking long bean seeds in water for 24 hours. This softens the seed coat and accelerates the germination process, giving your plants a strong start.
Step 2: Preparing Seedling Containers
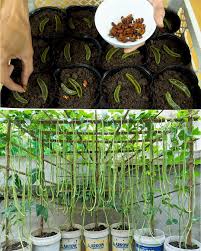
Choose small seedling containers and place two long bean seeds in each one. Along with the seeds, add two small aloe vera cuts to each container, as they help keep the soil healthy and free from pests. Cover the seeds lightly with soil and keep the containers consistently moist until germination.
Step 3: Preparing Growing Containers
After a week of seedling growth, prepare the growing containers. For optimal growth, create a compost mix that consists of 60% soil, 20% vermicompost, and 20% rice husks. If you are using recycled buckets as containers, ensure they have adequate drainage to prevent waterlogging.
Step 4: Incorporating Trichoderma and Planting Seedlings
Before transplanting the seedlings into their new containers, incorporate Trichoderma, a beneficial fungus that helps fight soil diseases, into the compost mix. Then, gently plant the seedlings into the containers, ensuring they have enough space to grow.
Step 5: Creating a Support System
Long beans are climbing plants, so providing vertical support is essential. Insert a 5-foot (1.5 meters) wooden stick into each container. Use smaller sticks or twine to create a grid-like structure that will allow the vines to climb as they grow.
Step 6: Fertilization and Maintenance
Fertilizing long beans at the right intervals helps ensure strong, healthy plants:
- Initial Fertilization: Right after transplanting, apply a balanced fertilizer or a rich, organic compost mix to the growing containers. This will provide essential nutrients for the young plants.
- Second Fertilization: About 25 days later, apply a mixture of kitchen waste (like fruit and vegetable scraps) and vermicompost to the soil to further enhance nutrient content.
- Third Fertilization: Another 25 days after the second fertilization, add watermelon waste and cover with more compost. This will provide the plants with continued nourishment as they grow.
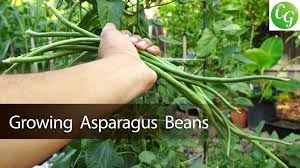
Step 7: Harvesting Long Beans
Your long beans will be ready to harvest in approximately 95-100 days, depending on growing conditions. Harvest the beans once they reach their full length, and enjoy fresh, home-grown vegetables in your meals.
By following these detailed steps, you’ll be able to cultivate a healthy, thriving long bean crop right in your home garden. With the right care and attention, you can enjoy a bountiful harvest from your container-grown long beans. Happy gardening!